JsSpim

JsSpim (link: https://shawnzhong.github.io/JsSpim/) is an online MIPS32 simulator based on Prof. James Larus's Spim.
Spim is a self-contained simulator that runs MIPS32 programs. It reads and executes assembly language programs written for this processor. Spim also provides a simple debugger and minimal set of operating system services. Spim does not execute binary (compiled) programs. Spim implements almost the entire MIPS32 assembler-extended instruction set. (It omits most floating point comparisons and rounding modes and the memory system page tables.) The MIPS architecture has several variants that differ in various ways (e.g., the MIPS64 architecture supports 64-bit integers and addresses), which means that Spim will not run programs for all MIPS processors.
The source code is published at GitHub

Screenshot

image-20190530030929768

Screen Record

Features

  • Click on an instruction to toggle breakpoint
  • Use the range slider to control the execution speed
  • Highlight on changed registers, data segment, and stack
  • Radix support for all values

Built With

  • Spim - The original simulator written in C++
  • Emscripten - Toolchain to compile C++ source code to WebAssembly using the LLVM IR.
  • Bootstrap - Using the CSS library to build the UI
  • highlight.js - For highlighting the source code

xv6 File System Visualizer

This is an online visualizer for xv6 file system image. The source code is published at GitHub

Screenshot

screenshot

Screen Record

Features

  • See the overall layout of an xv6 filesystem image
  • View the metadata storoed in inodes
  • Trace the relationship between files/directories, inodes, and blocks
  • Check the file/directory path for inodes
  • Basic inconsistency checking:
    • Invalid inode type.
    • Inode marked use but not found in a directory.
    • Inode referred to in directory but marked free.
    • Block used by inode but marked free in bitmap.
    • Bitmap marks block in use but it is not in use.

Remote SSH to UW-Madison CS Lab with VSCode

This tutorial teaches you how to remote ssh to the CS Lab at University of Wisconsin-Madison using Visual Studio Code.

Preparation

1. Download Visual Studio Code from code.visualstudio.com and install it. 2. Install plugin "Remote - SSH" in the Extensions view

3. Open settings. Check the box for "Remote.SSH: Lockfiles In Tmp" and "Remote.SSH: Show Login Terminal" File locking does not work when the home directory is mounted from an AFS. Setting the path of lockfiles to /tmp solves the problem. For more detail, see https://github.com/microsoft/vscode-remote-release/issues/540 For the second setting, VS Code should automatically prompt you to enter the password, but I had some trouble seeing the prompt before. I suggest enabling this so the password is entered in the terminal like normal ssh.

SSH Configuration

1. In the Remote Explorer view, click the Configure icon at the right of "SSH TARGETS" 2. Select the first SSH configuration file to edit 3. Add the CS Lab host to the file using the SSH config file format

For example,
Host CSLab
    HostName best-linux.cs.wisc.edu
    User szhong
If you want to connect to a machine that is only accessible inside the department network, you can use ProxyCommand. Take mininet as an example:
Host Mininet
    HostName mininet-xx.cs.wisc.edu
    User mininet
    ProxyCommand ssh -W %h:%p CSLab
Optionally, If you are on macOS and Linux and you want to reduce how often you have to enter a password, you can add the following entry to the config file
Host *
    ControlMaster auto
    ControlPersist  600
    ControlPath  ~/.ssh/%r@%h-%p
    Compression  yes
It reuses the ssh connection when you connect to the machine next time (within the timeout), so you don't need to enter the password or do anything.

Remote SSH

You can now remote SSH to the CS Lab by clicking the newly-added entry under "SSH TARGETS" A new VSCode windows will pop up with the bottom right corner showing "SSH: CSLab"

Open a directory and happy coding :D

Recommended Plugins

Animated gif of 2 people highlighting editing code in real-time together.

  • If you are developing C or C++, the official C/C++ plugin is very useful for auto-completion, linting, etc.
  • For Java developer, I suggest using Language Support for Java(TM) by Red Hat. Note that all the plugins are running at the remote machine and this plugin is hungry at the memory. If the target machine has less than 1G of memory (say mininet VM), Java Language Support by George Fraser is preferred as it has less memory footprint.
  • The Resource Monitor plugin displays CPU frequency, usage, memory consumption, and battery percentage remaining in the status bar. Pretty helpful for remote machines with low resources.

Remote Desktop Access to UW-Madison CS Lab

This tutorial teaches you how to access the remote desktop of CS Lab computers, so you don't have to be physically at the CS Lab to use desktop environments.

Preparation

For security reasons, the remote desktop service (port 3389) is not accessible from the public internet. You can either connect to the CS Department VPN or use ssh port forwarding. 
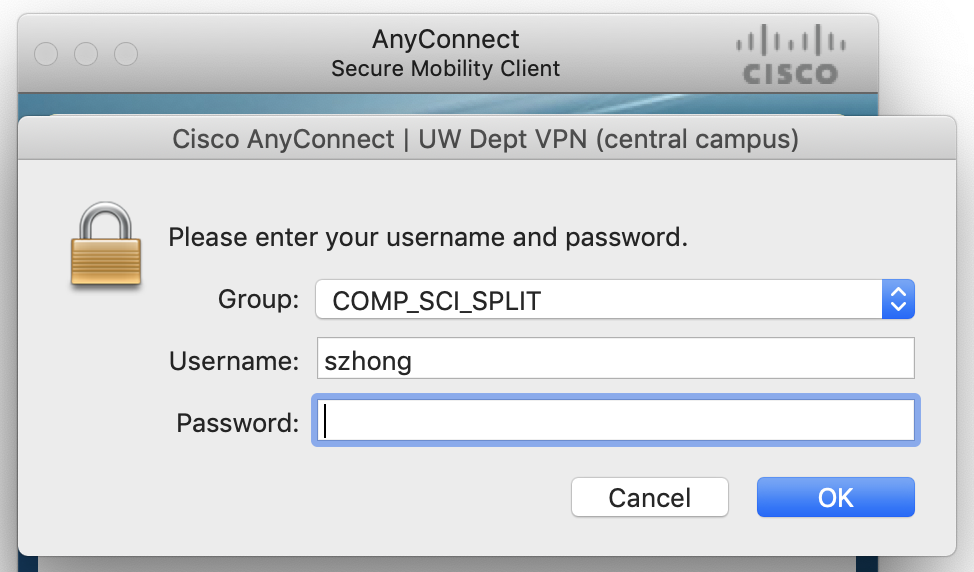
To connect to the VPN, you first need to download and install AnyConnect (not GlobalProtect) from here. Enter dept-ra-cssc.vpn.wisc.edu for the server address, and choose the group to be COMP_SCI_SPLIT.

Alternatively, you can use ssh port forwarding to get access to the remote desktop service. Run the following line in your command line and enter your password.
ssh -fNT -L 3389:localhost:3389 <cs-login>@<server>
Here, -f stands for background, -N means no remote command, -T disables pseudo-terminal allocation and -L 3389:localhost:3389 forwards the 3389 port at the remote server to the local computer. You can choose <server> from the following list. Avoid using best-linux.cs.wisc.edu, since we don't want to connect to a different server each time.
  • rockhopper-01.cs.wisc.edu through rockhopper-09.cs.wisc.edu
  • royal-01.cs.wisc.edu through royal-30.cs.wisc.edu
  • snares-01.cs.wisc.edu through anares-10.cs.wisc.edu
  • emperor-01.cs.wisc.edu through emperor-07.cs.wisc.edu

Connect to Remote Desktop

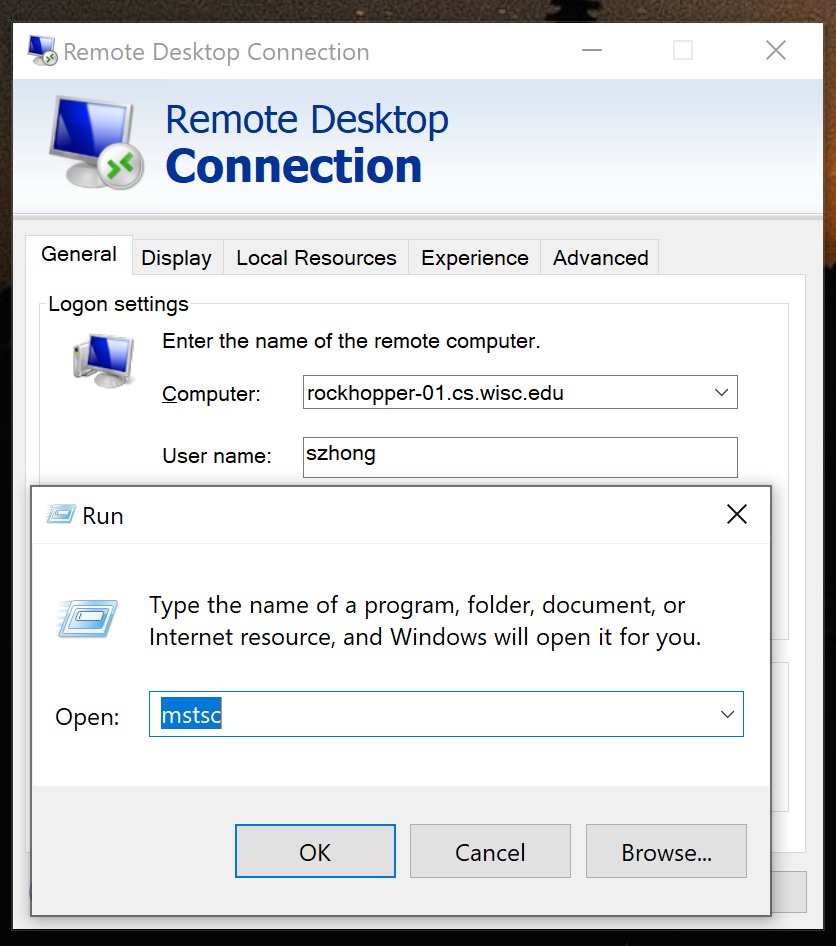
For Windows users, press Ctrl + R to open Run and run the program mstsc. (Or navigate to Start Menu -> All Programs -> Accessories -> Remote Desktop Connection). This program should be preinstalled on all Windows machines. Set the remote computer to be one of the CS Lab computers above (or localhost if you are using SSH port forwarding), and enter your user name.

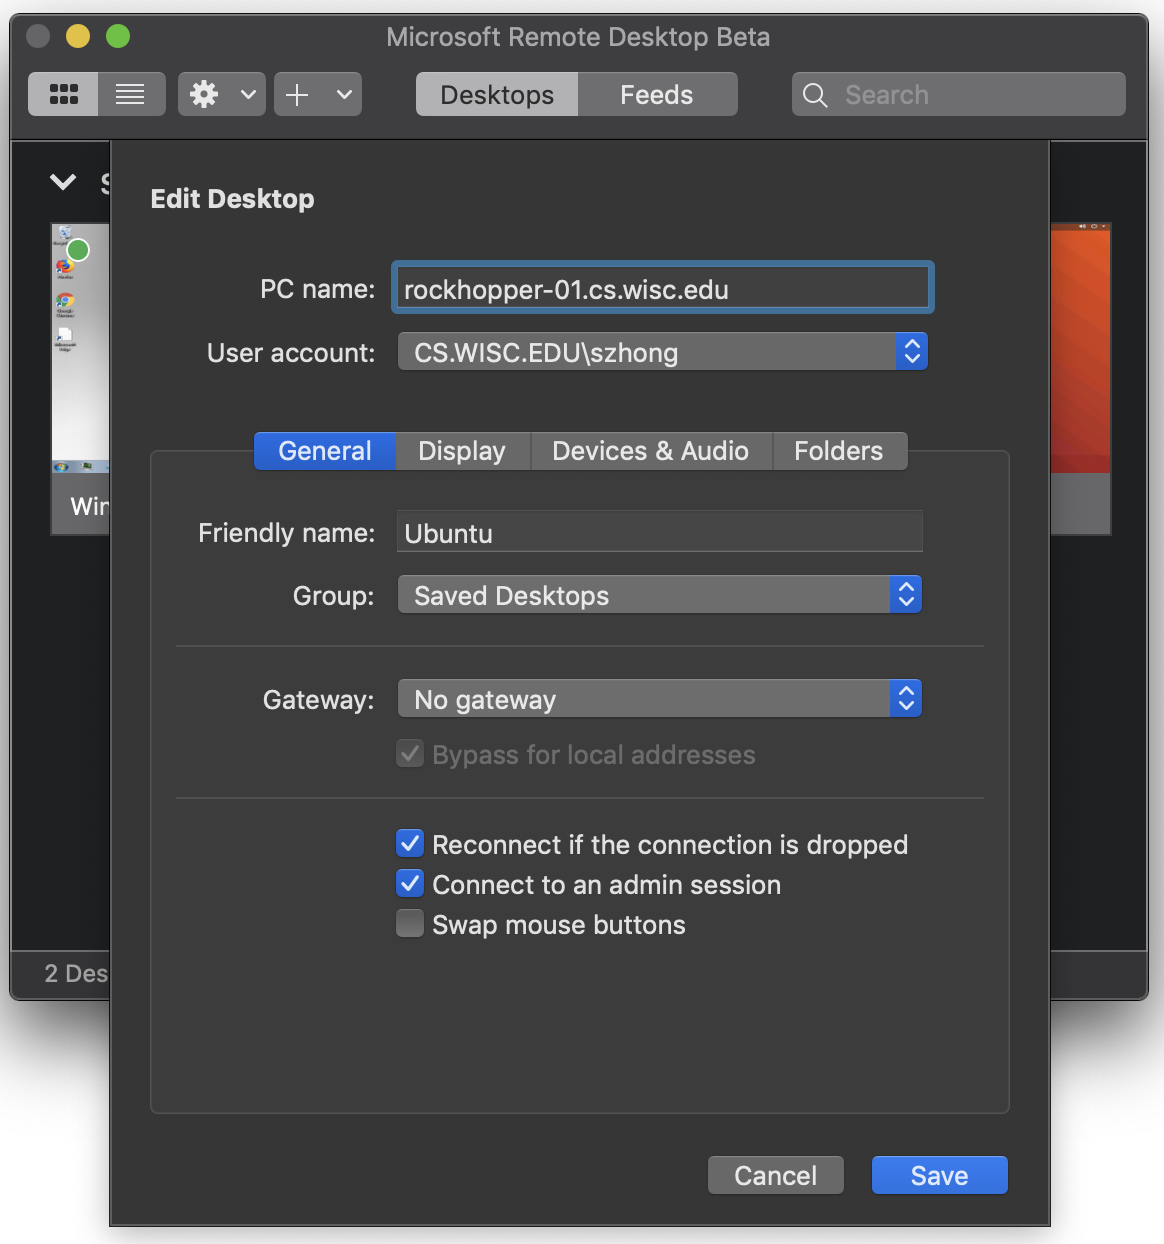
For Mac users, download Microsoft Remote Desktop from here, and follow the configuration for Windows.

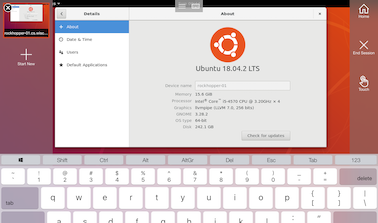
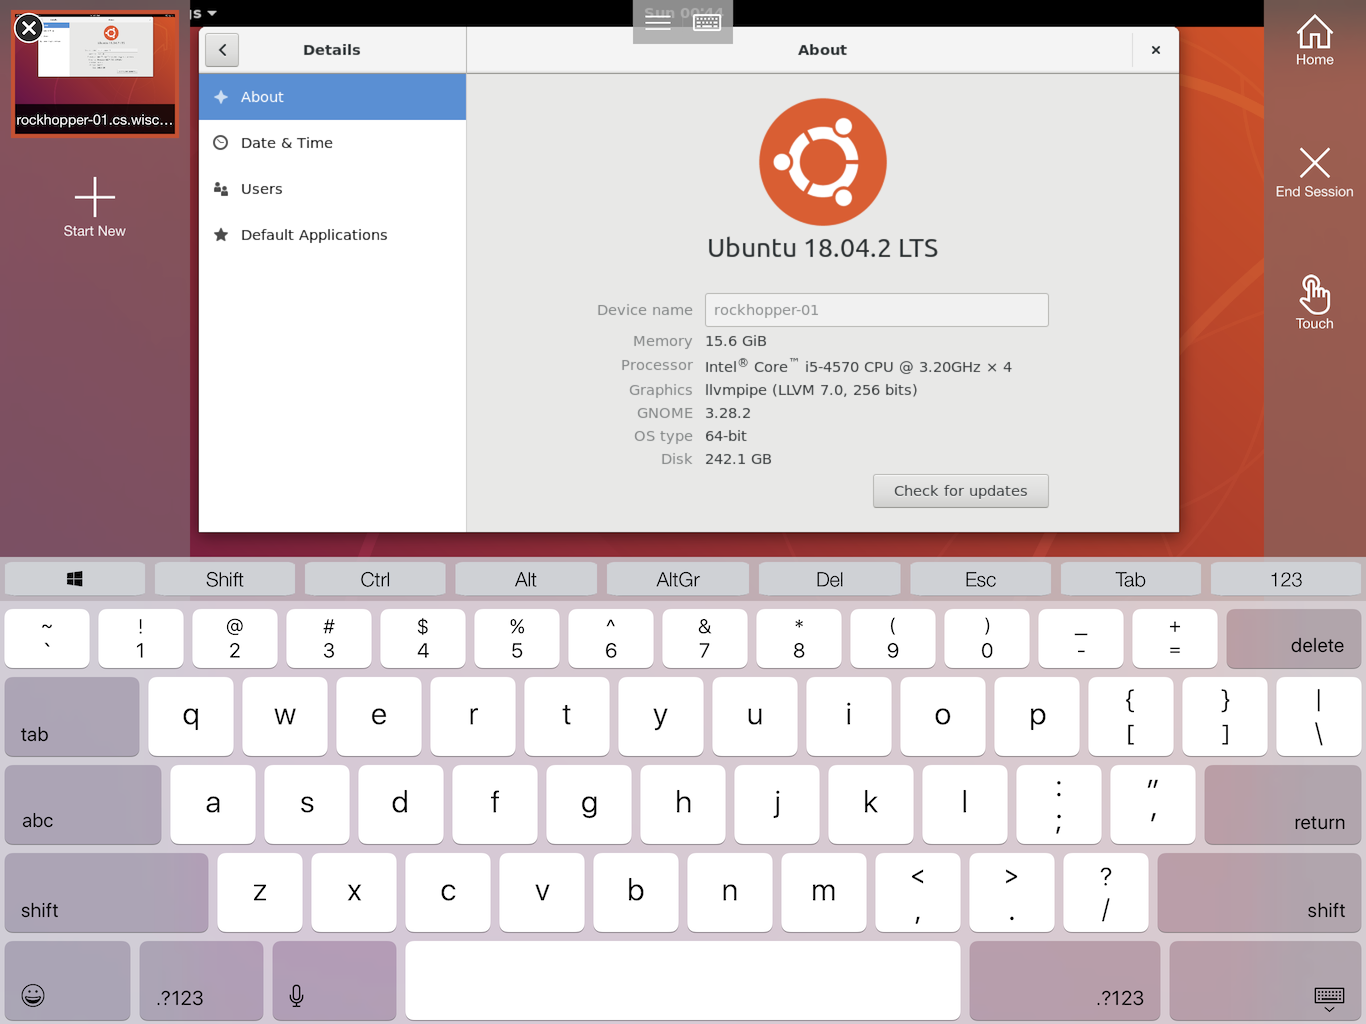
Since Microsoft Remote Desktop is also supported on Android and iOS, you can connect from your mobile devices! Here is an example at iPad with touch screen support:
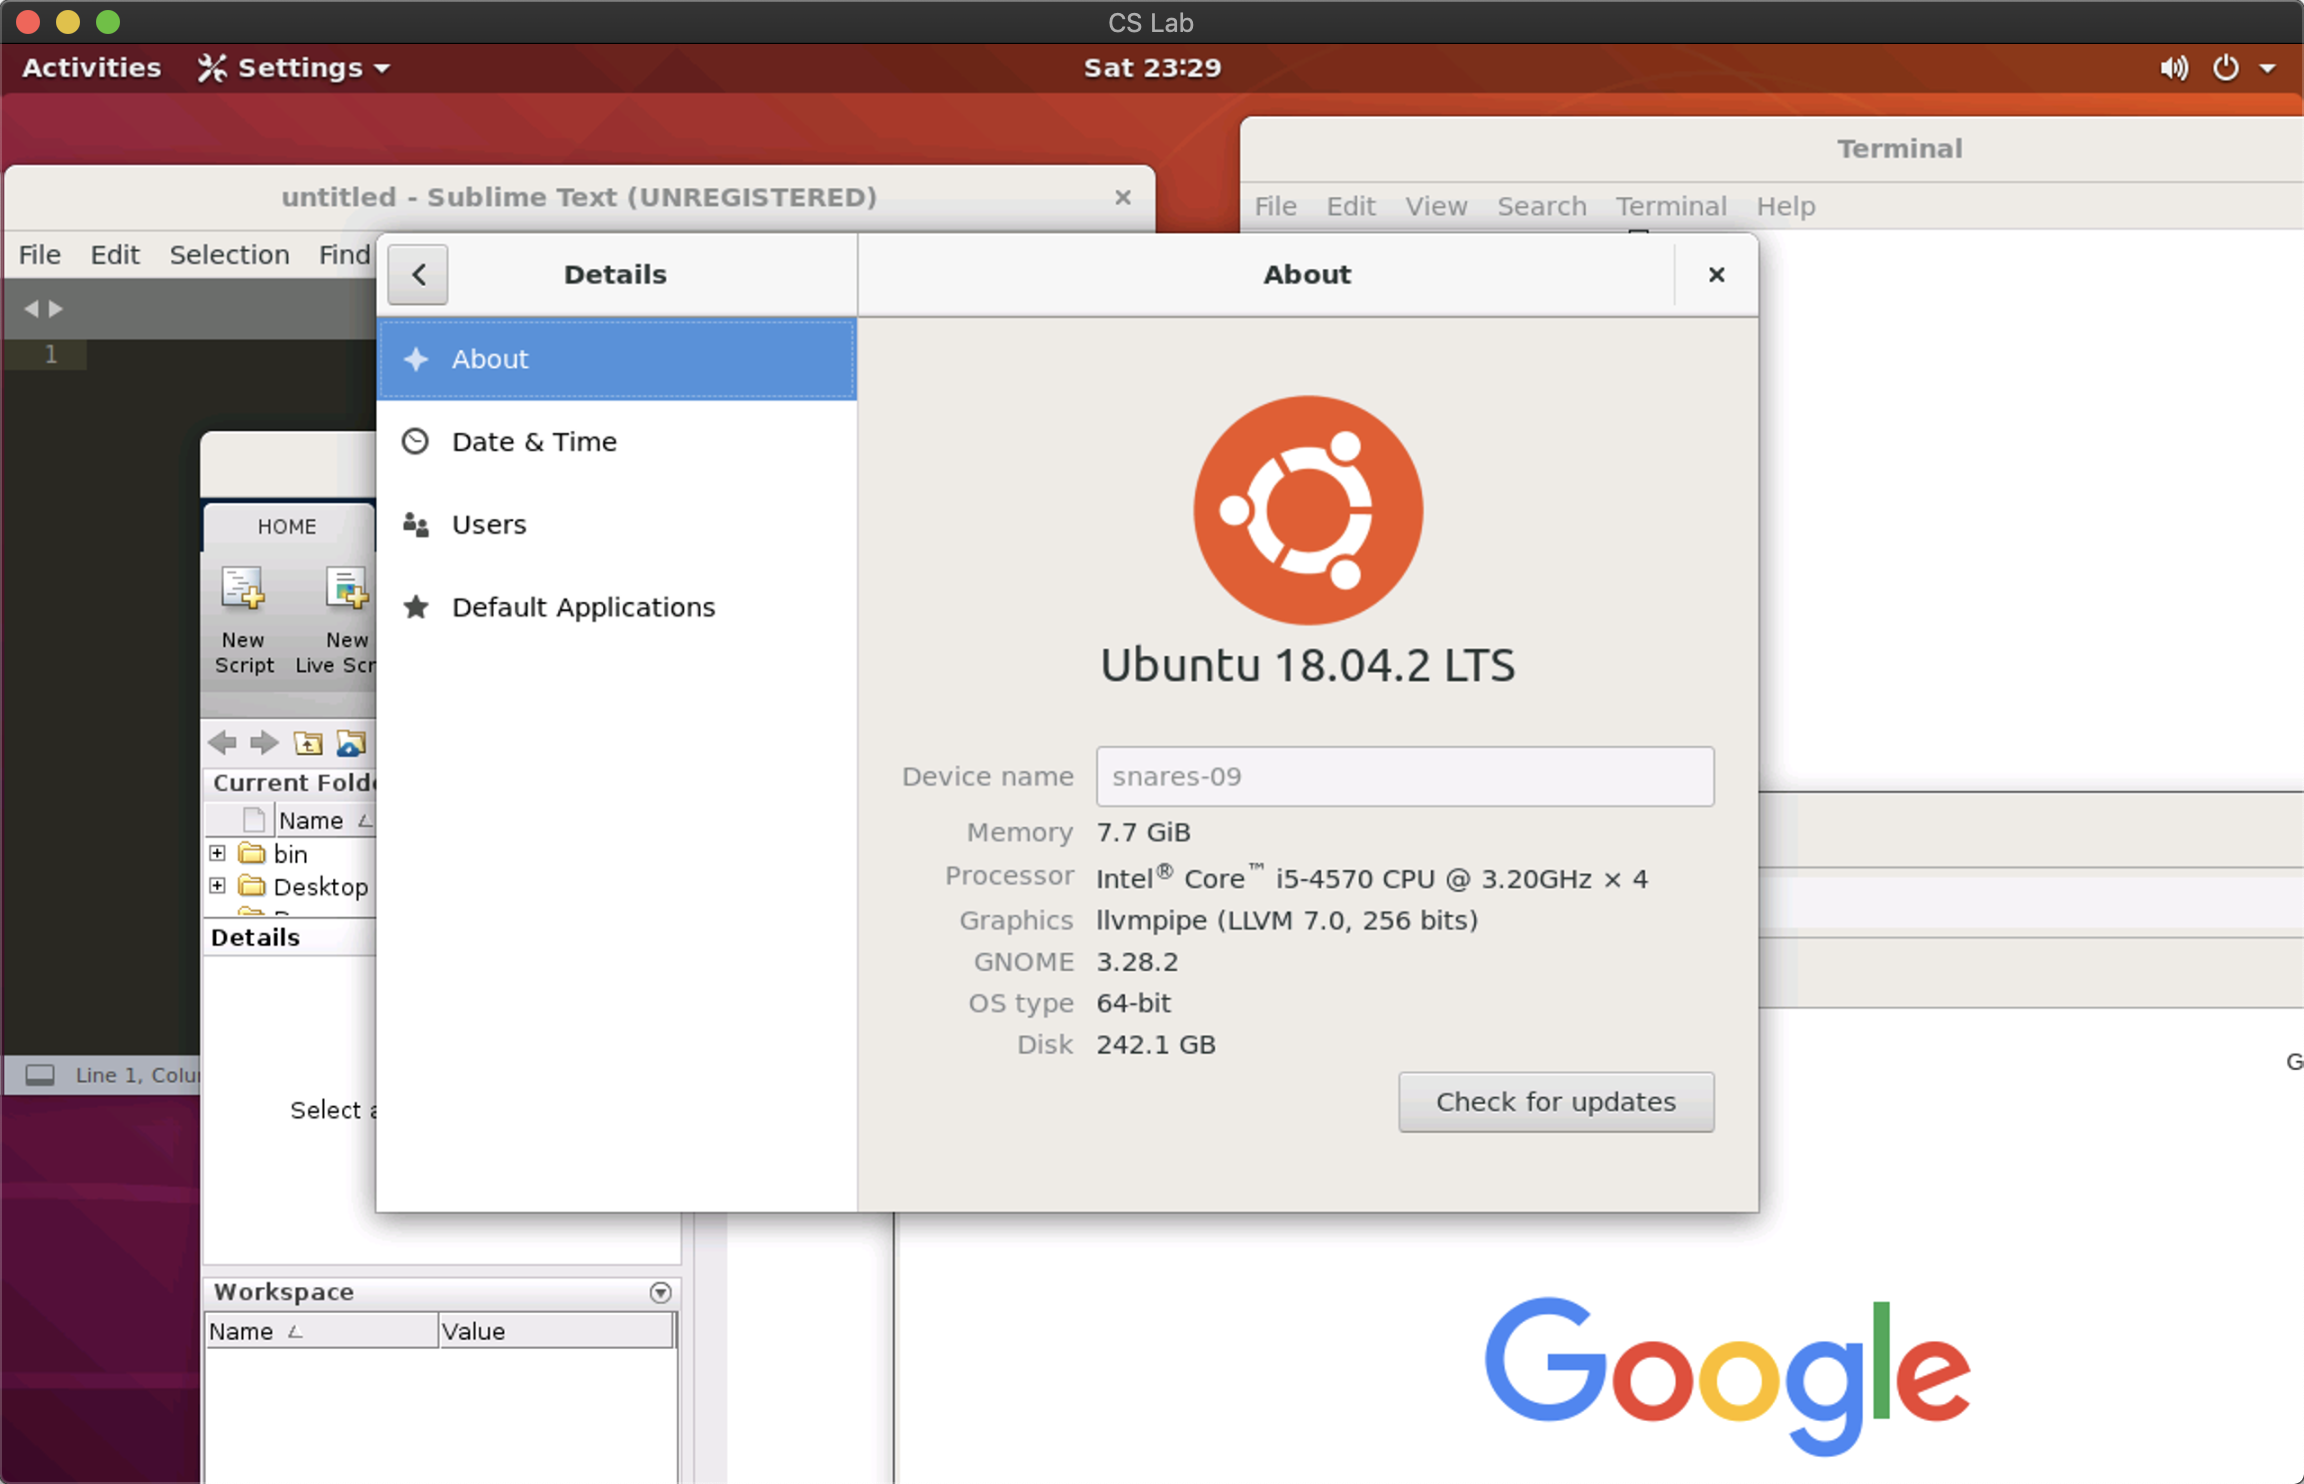
How is it useful?

There are a lot of programs pre-installed on CS Lab computers, so you don't need to configure the environment on your local computer. Examples include:
  • Scientific computing: Matlab, Octave, Maple
  • Data analysis: R, Jupyter Notebook, Python (with pandas, numpy, matplotlib)
  • IDE & editor: VSCode, Eclipse, Atom, Sublime, Vim, EMACS
  • Other: VirtualBox, TeXstudio, Slack, LibreOffice
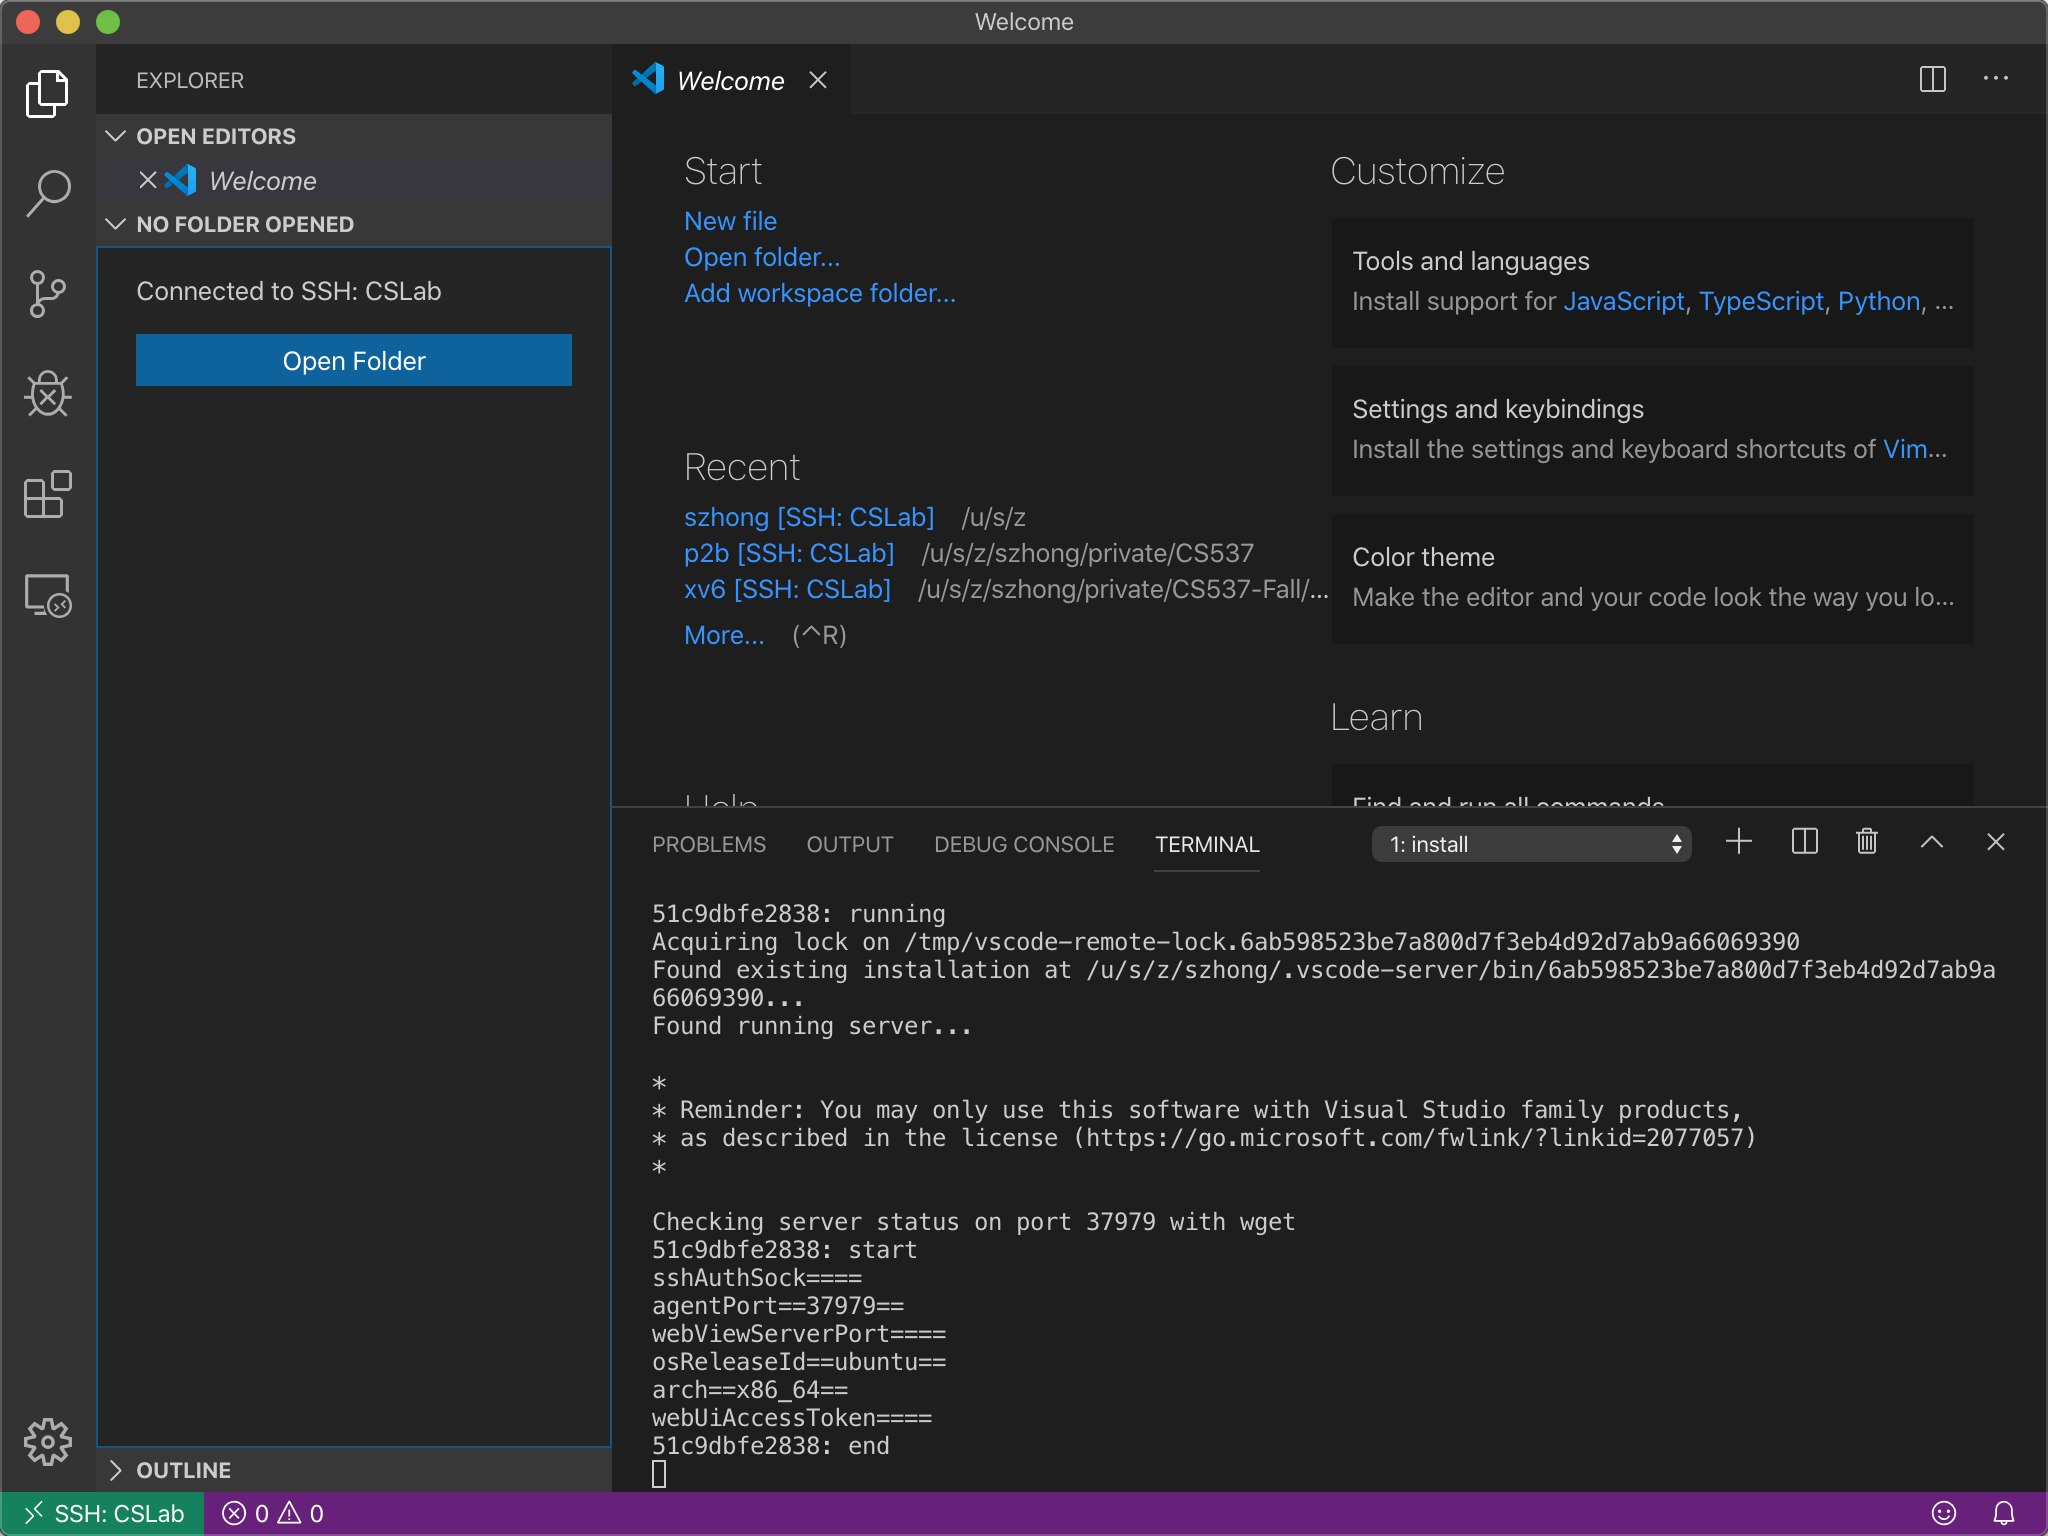
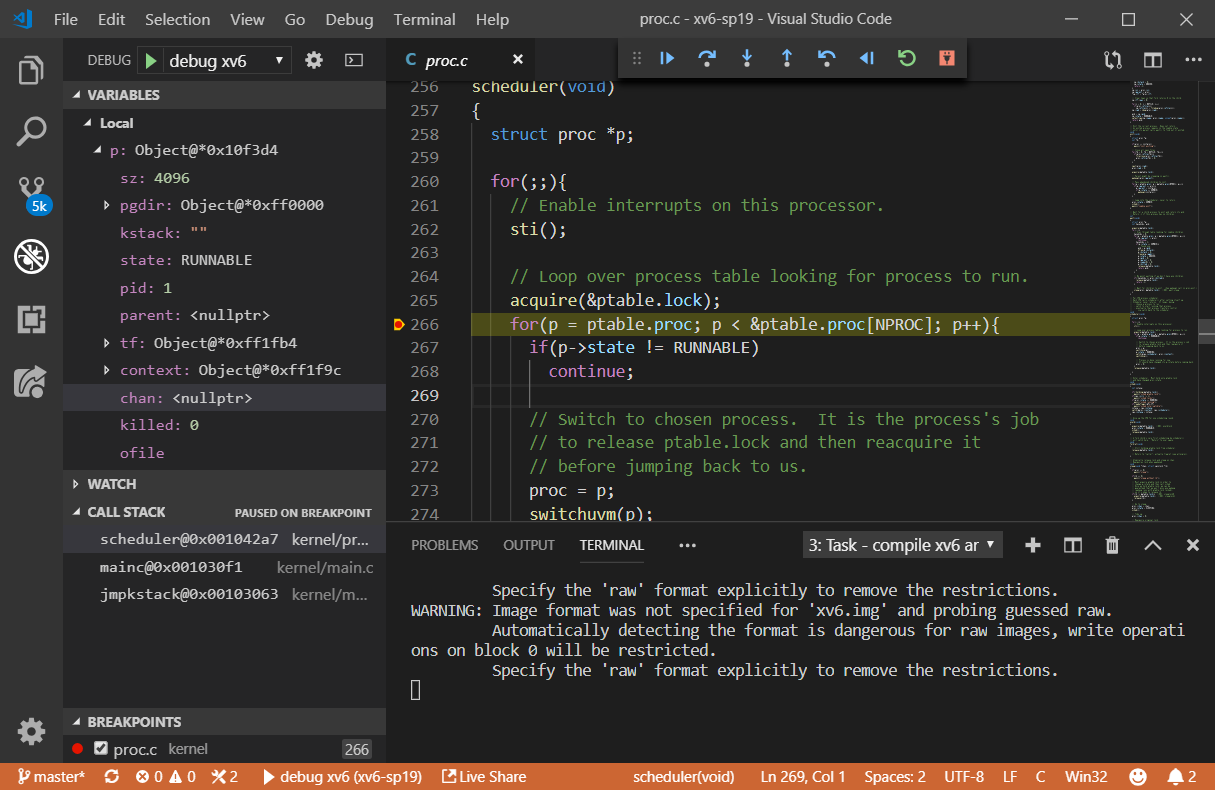
You can start a VSCode Live Share from a CS Lab computer, and edit the code from your local computer, or share the link with your teammate for collaboration. I wrote a tutorial about setting up Live Share and xv6 collaborative debug. Feel free to check them out.

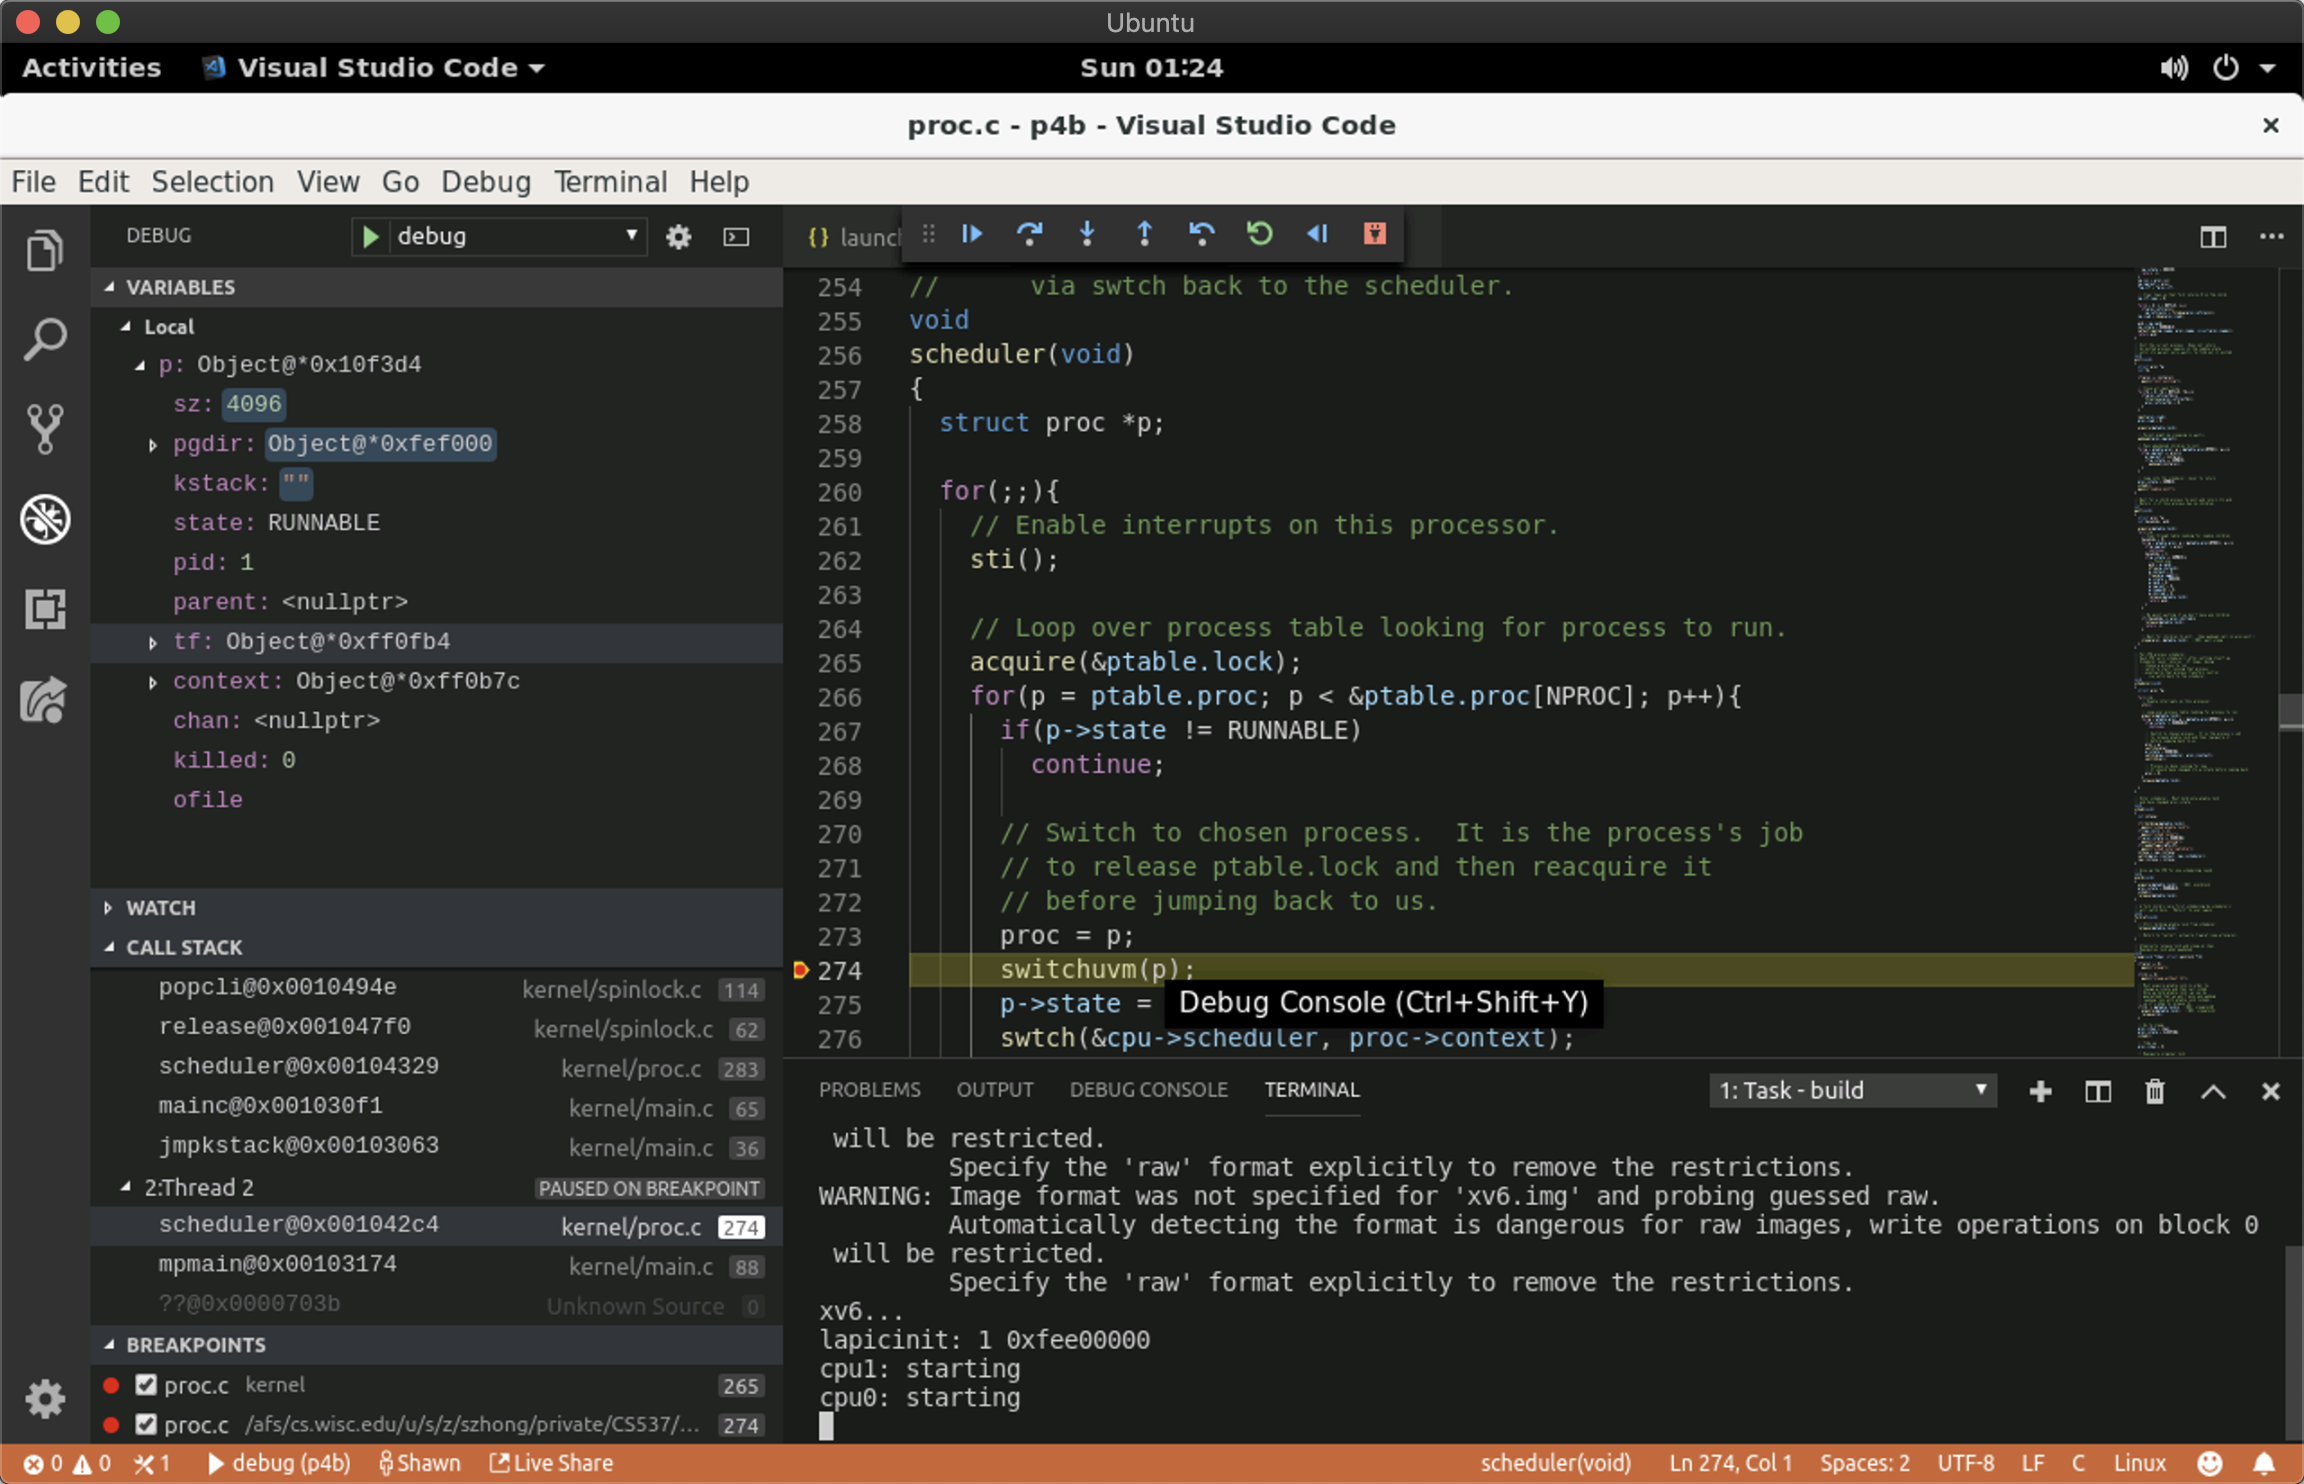
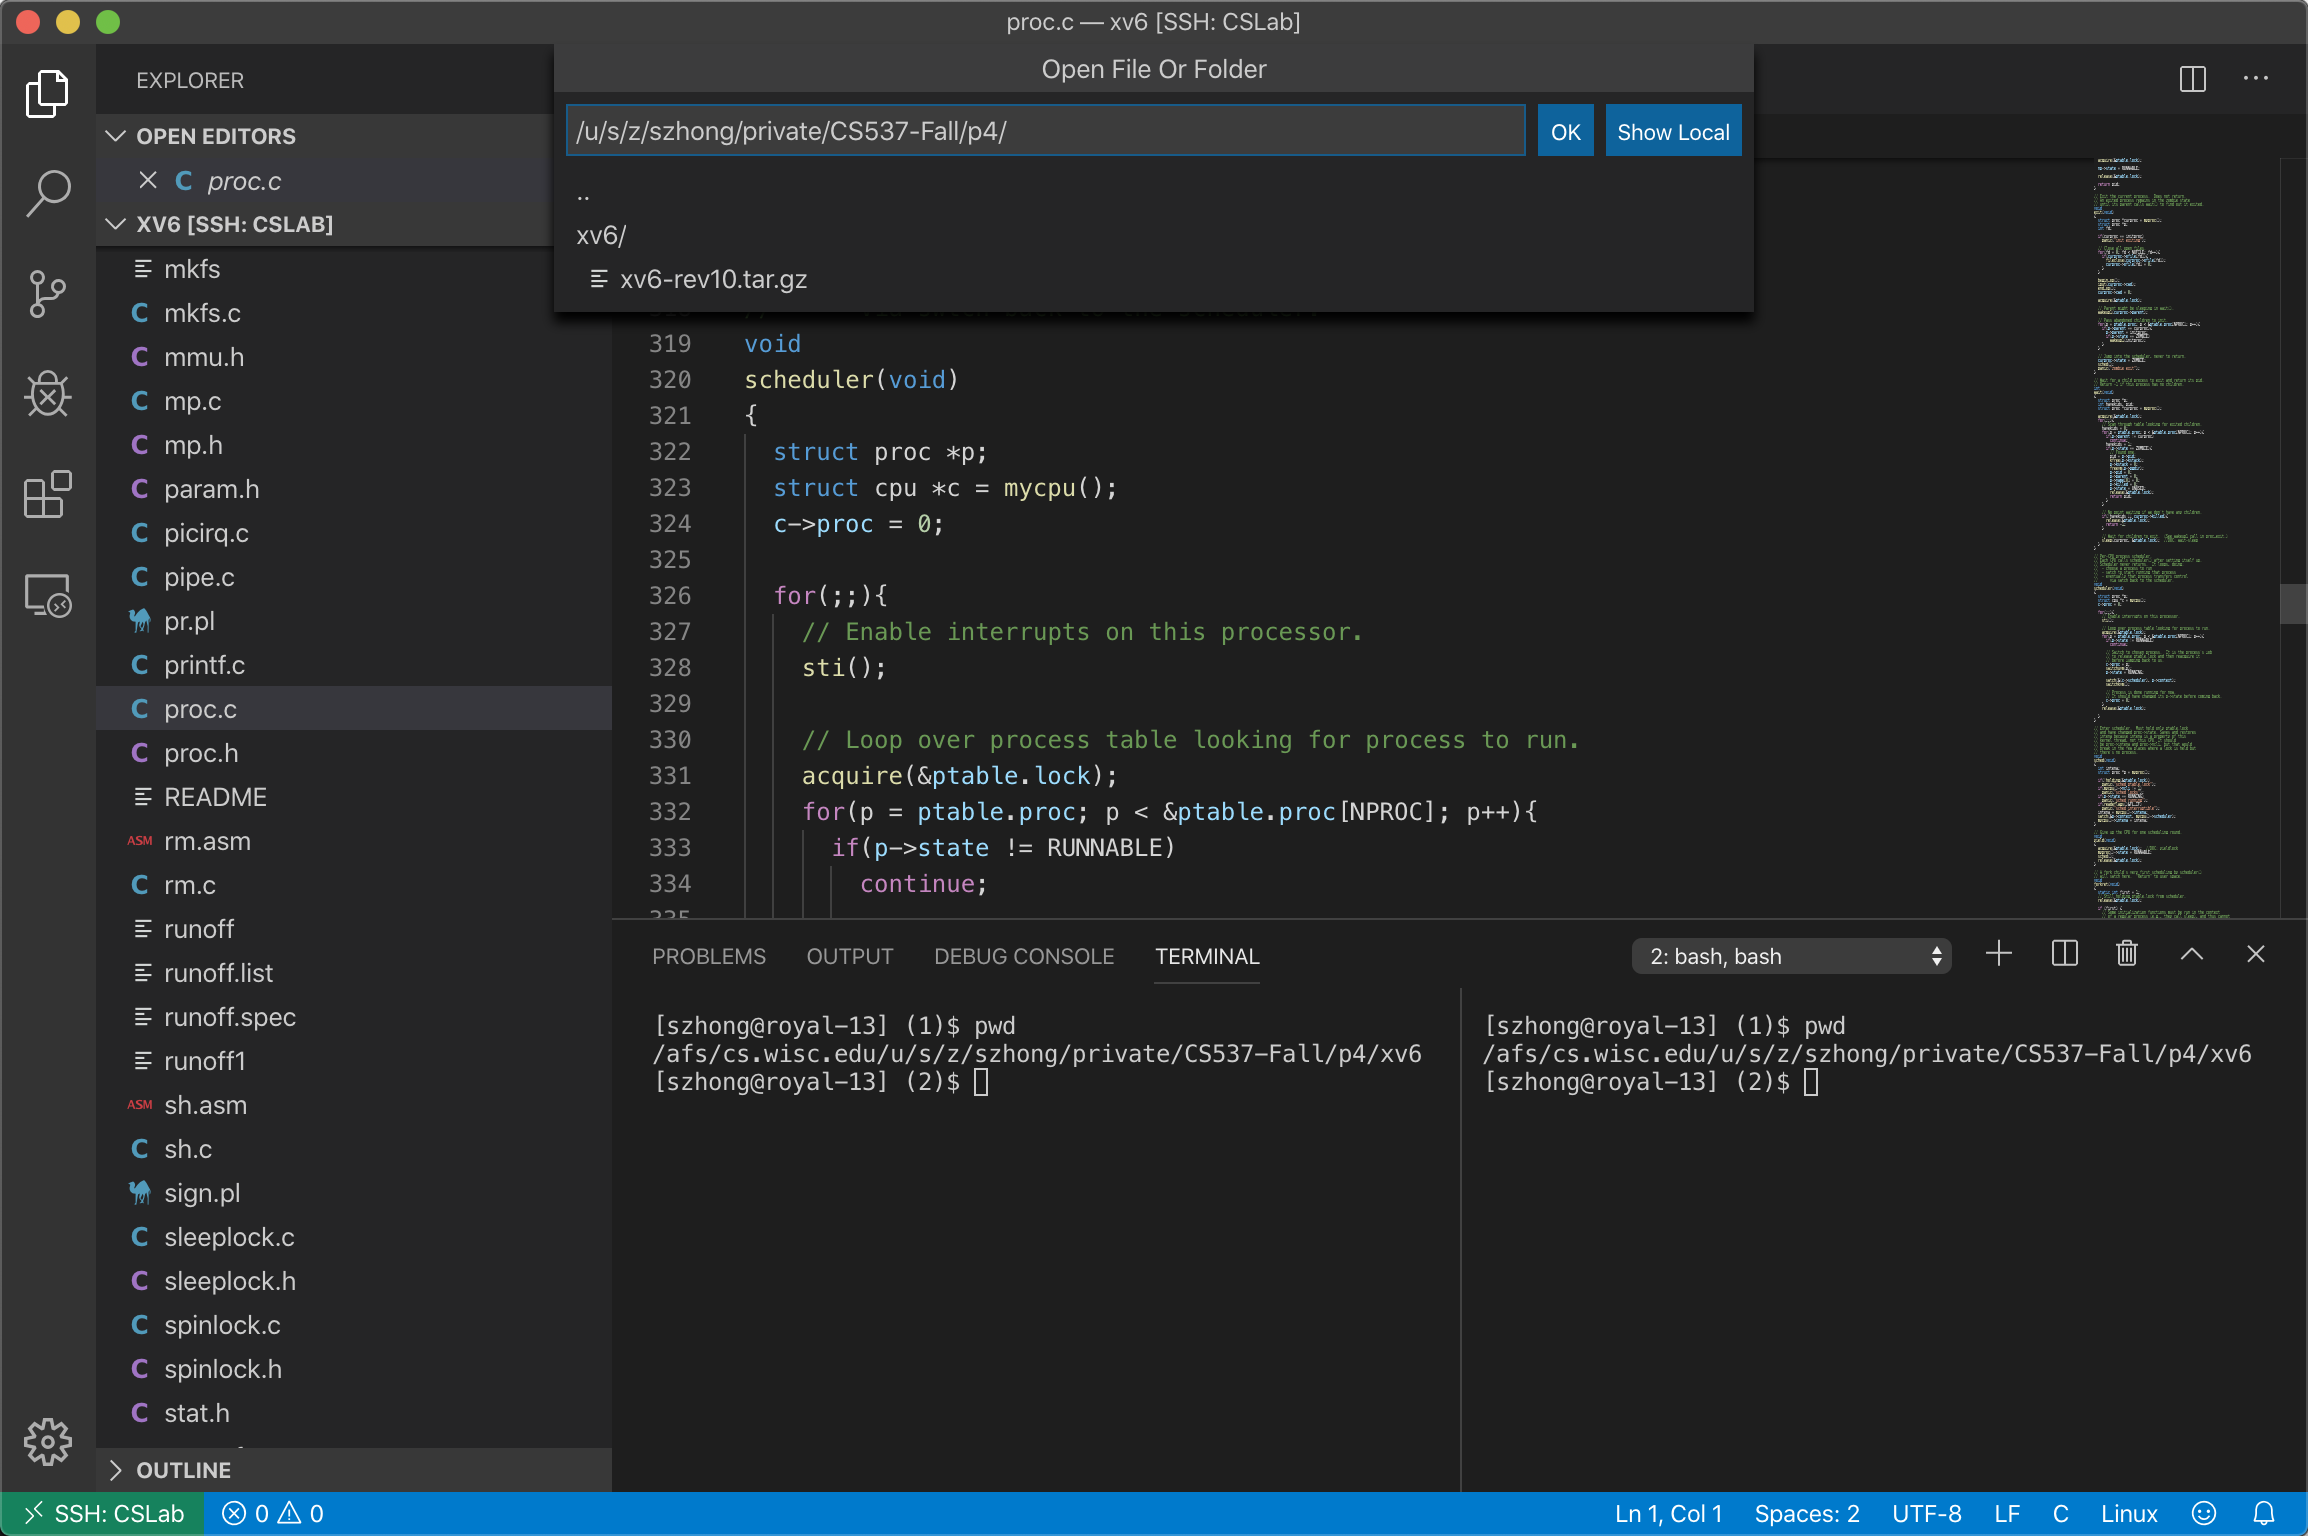
For debuging xv6 using VSCode, you need to install the Native Debug plugin, and your launch.json should look something like this:
{
    // Use IntelliSense to learn about possible attributes.
    // Hover to view descriptions of existing attributes.
    // For more information, visit: https://go.microsoft.com/fwlink/?linkid=830387
    "version": "0.2.0",
    "configurations": [
        {
            "type": "gdb",
            "request": "attach",
            "name": "debug",
            "executable": "./kernel/kernel",
            "target": ":25784",               // replace this with your debug port
            "remote": true,
            "cwd": "${workspaceRoot}",
            "valuesFormatting": "parseText"
        }
    ]
}
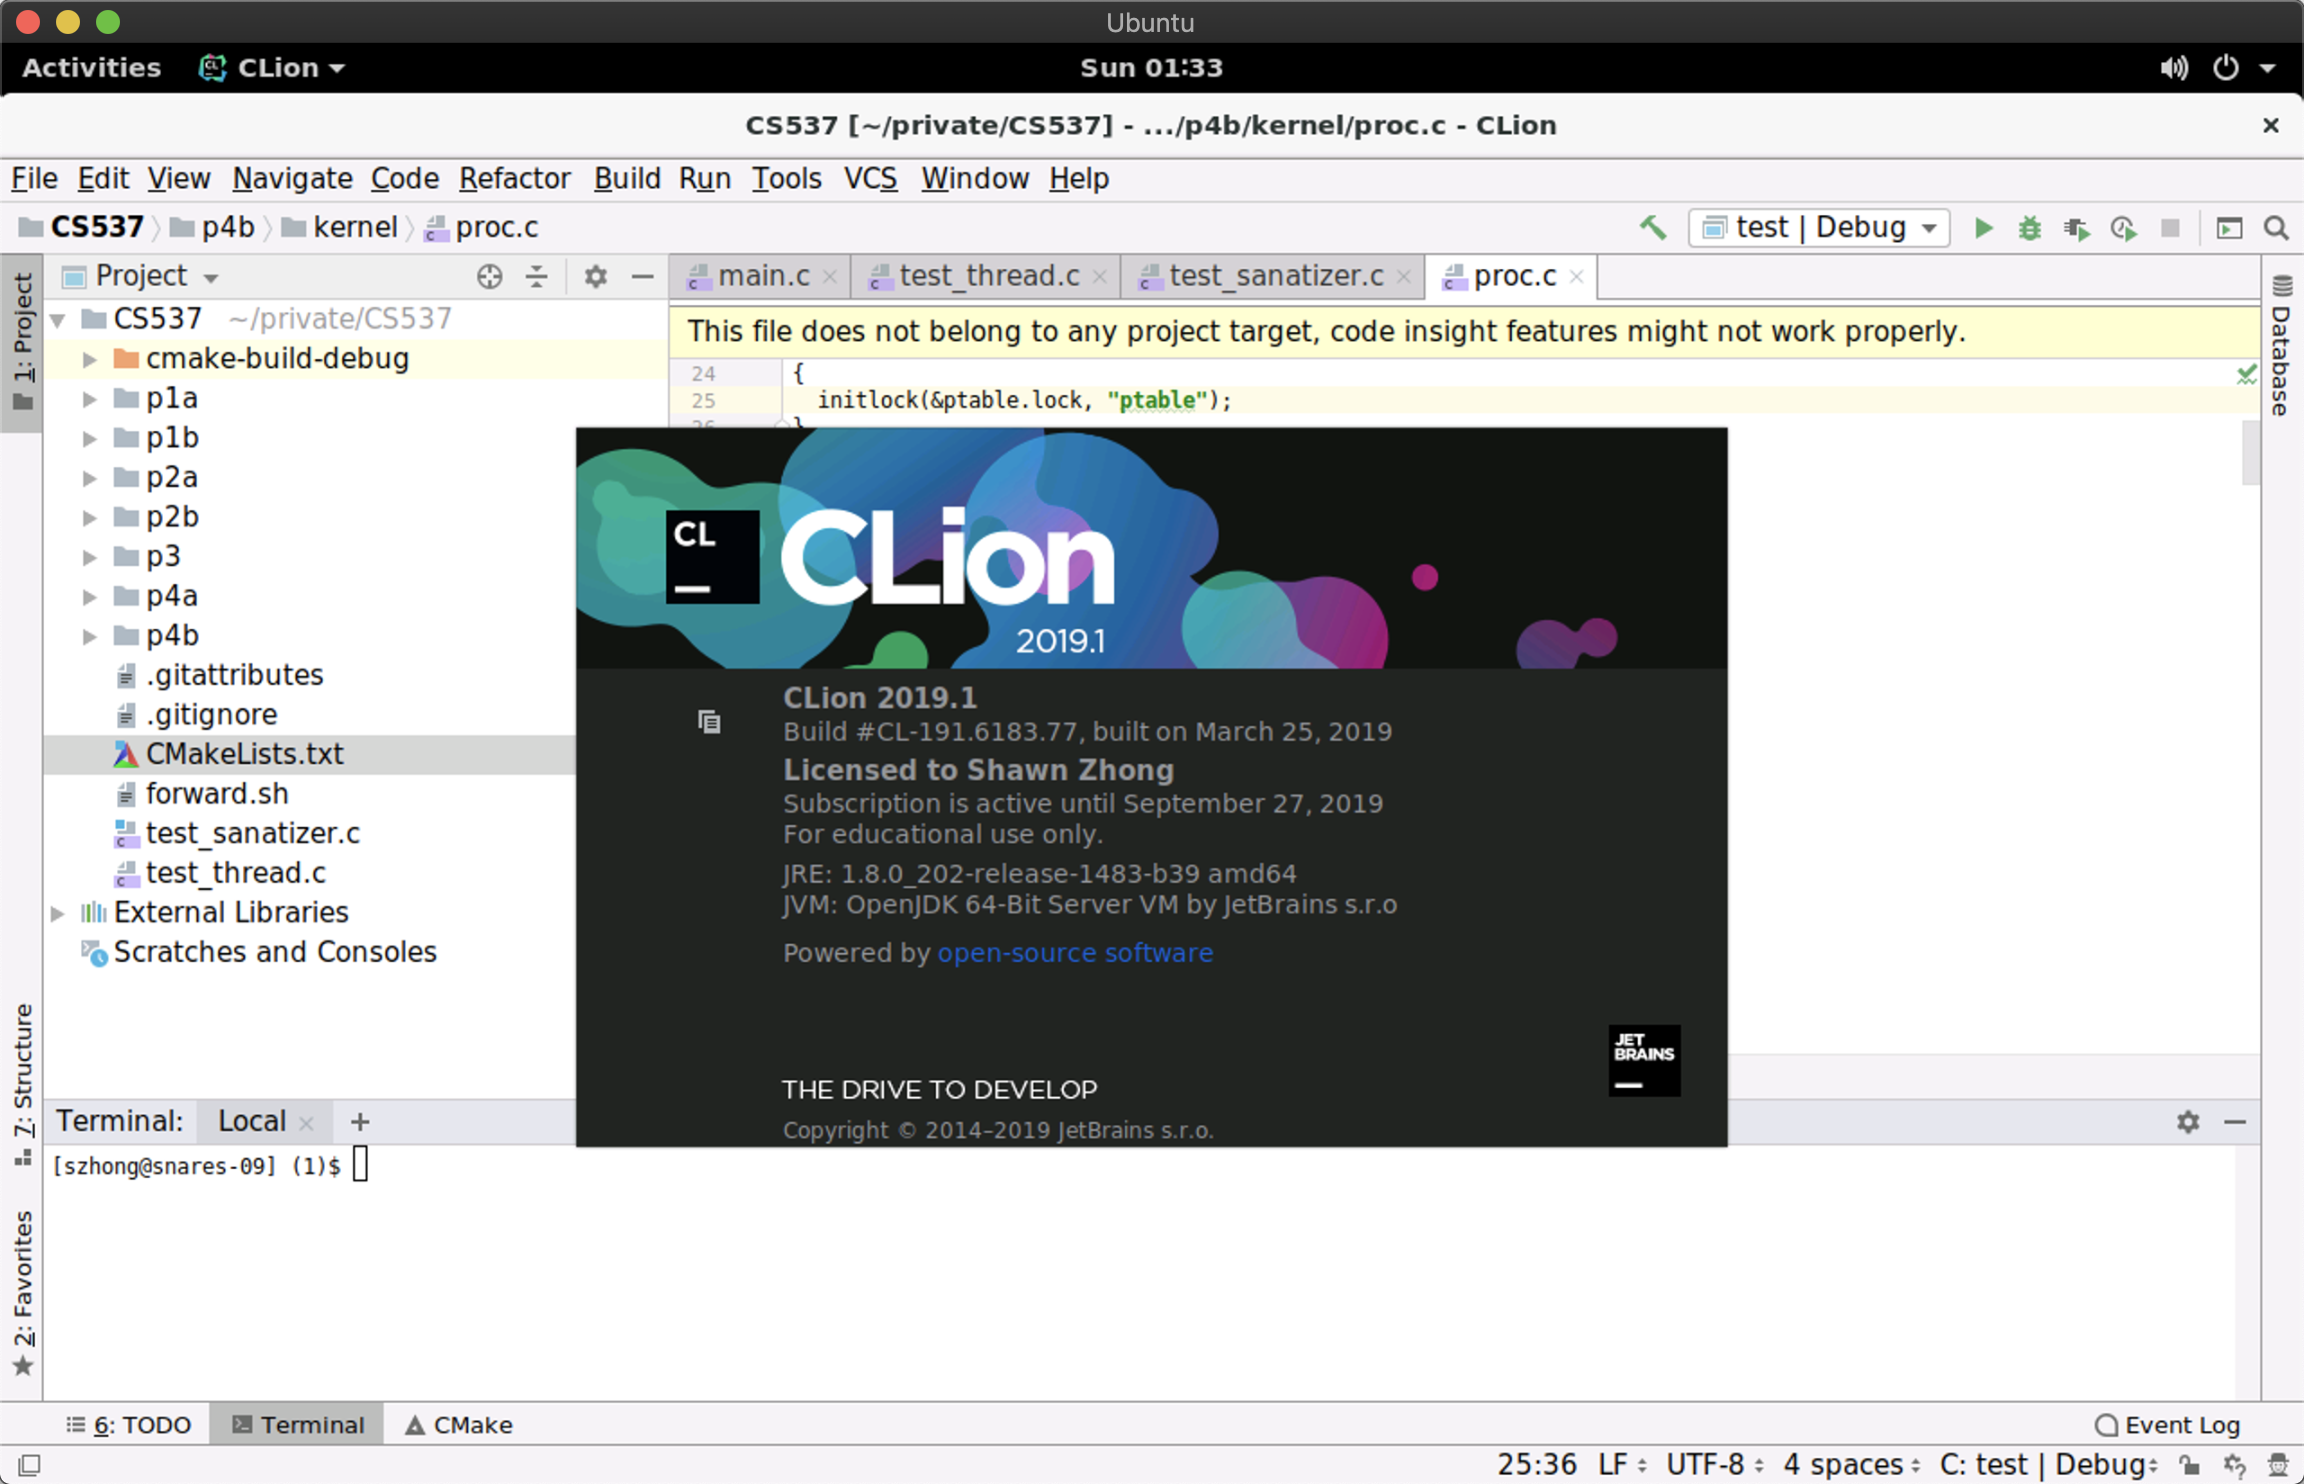
You can also install CLion on CS Lab computers, and work on the projects via remote desktop.

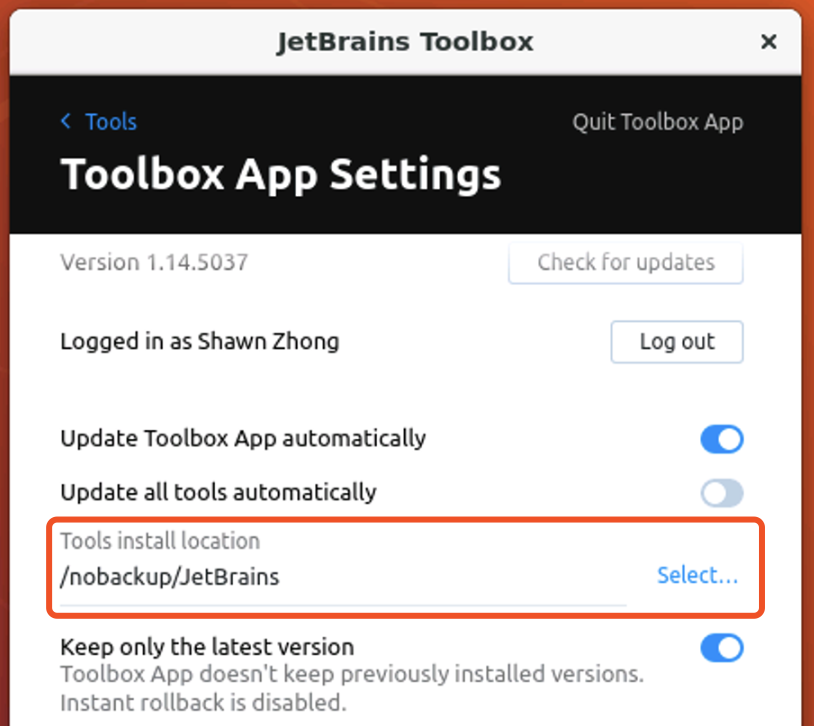
Note that your home folder (e.g., /u/s/z/szhong) is mounded from a network location, so it will be relatively slow to run programs from there. One workaround is to install programs under /nobackup, which is stored on the local disc of the computer you connected to. To install CLion, you can download JetBrains ToolBox from here, and set the installation folder to /nobackup/JetBrains

One More Thing

If you set the server address to be rd.cs.wisc.edu, you can connect to a Windows Remote Desktop.

References

https://csl.cs.wisc.edu/services/remote-access/department-vpn https://csl.cs.wisc.edu/services/remote-access/windows-remote-desktop-howto
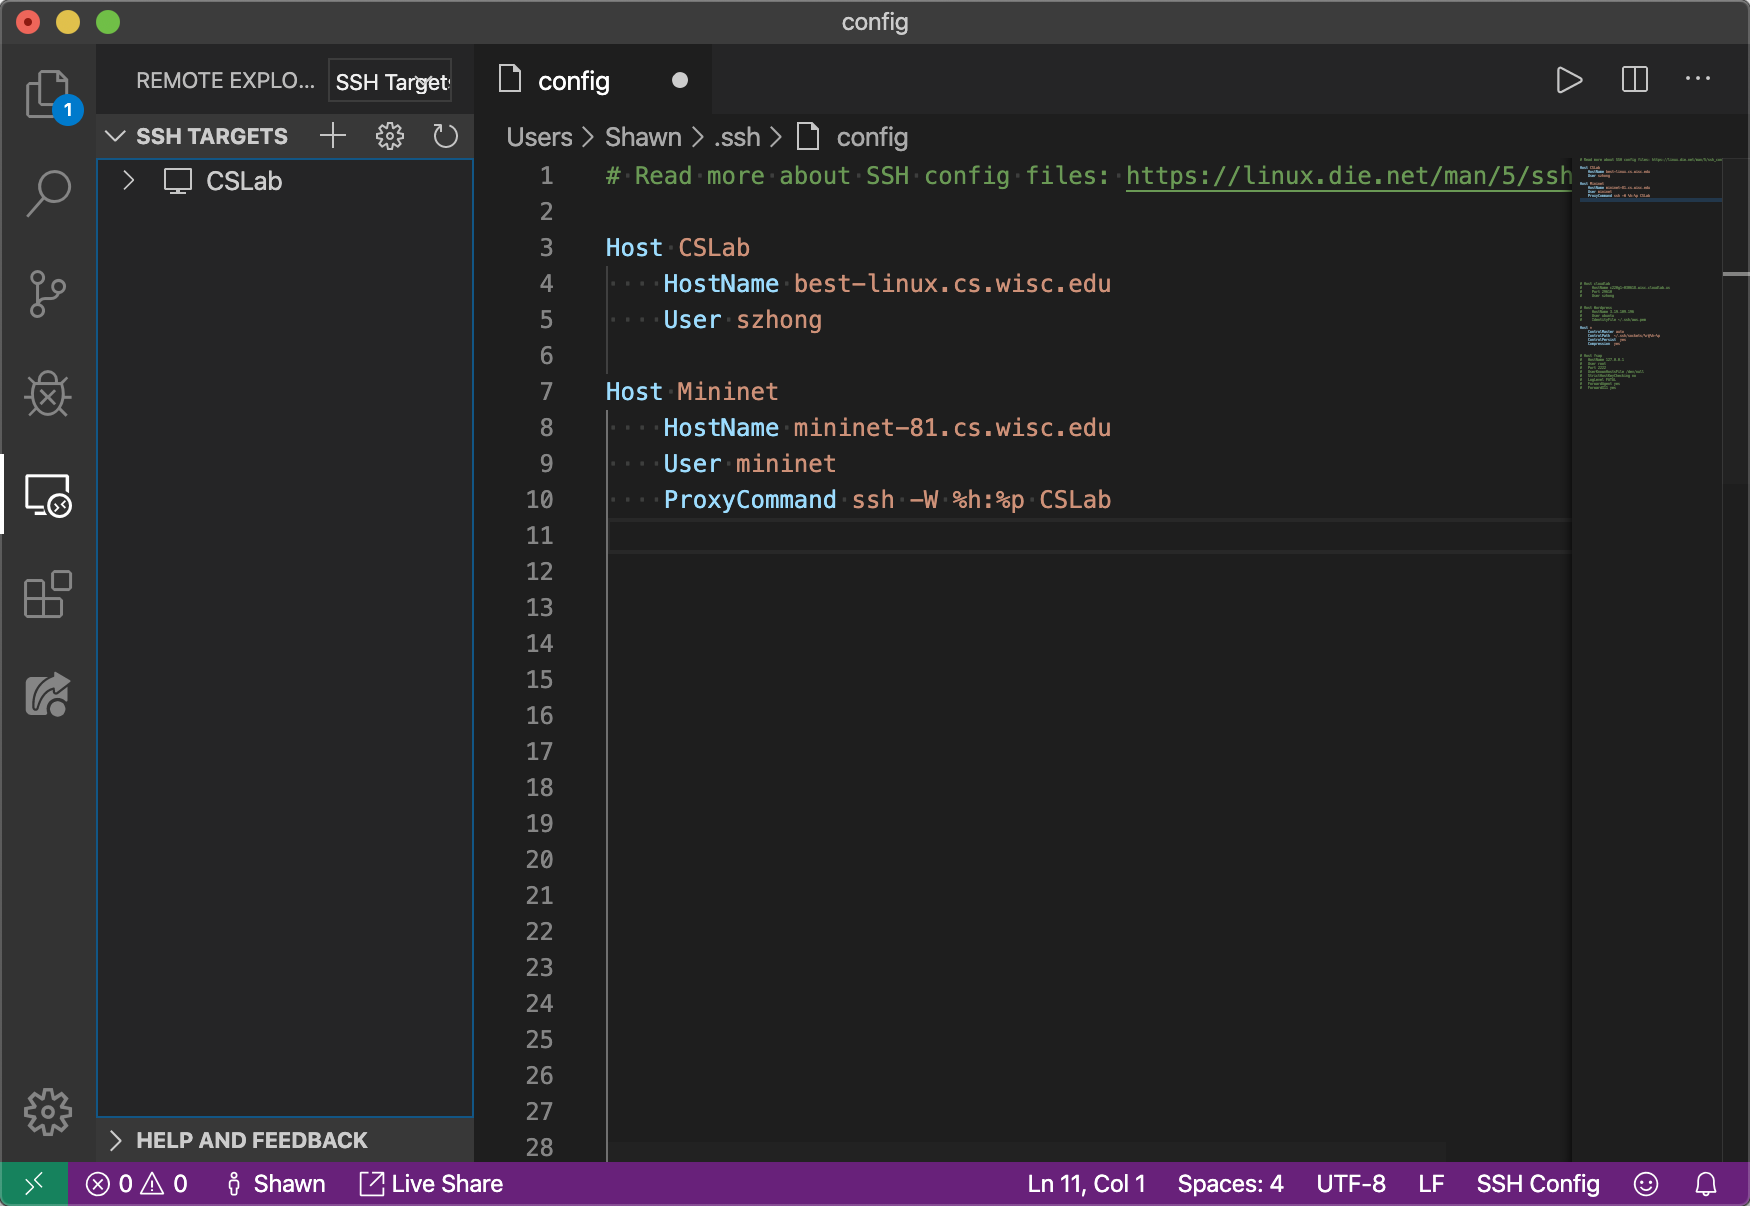
Detect Bugs using Google Sanitizers

Google Sanitizers are a set of dynamic code analysis tools to detect common bugs in your code, including
  • Thread Sanitizer: detect data race, thread leak, deadlock
  • Address Sanitizer: detect buffer overflow, dangling pointer dereference
  • Leak Sanitizer: part of Address Sanitizer, detect memory leak
  • Undefined Behavior Sanitizer: detect integer overflow, float-number overflow
  • Memory Sanitizer: detect of uninitialized memory reads

Preparation

For Windows users, install gcc with MinGW, or install Clang For Mac users, install Clang using `xcode-select --install` For Linux users, make sure you have gcc installed. Open CLion and make sure that the run button is clickable with toolchains configured correctly.

Run Program with Sanitizer

To run a program with sanitizer, we need a special flag -fsanitize to the compiler. Common options include: -fsanitize=address, -fsanitize=thread, -fsanitize=memory, -fsanitize=undefined, -fsanitize=leak. A full list of options can be found here. Note that it is not possible to combine more than one of the -fsanitize=address, -fsanitize=thread, and -fsanitize=memory checkers in the same program, so you may need to toggle the options multiple times for a comprehensive checking. For testing, let's add the following line to the CMakeLists.txt file:
set(CMAKE_C_FLAGS "${CMAKE_CXX_FLAGS} -fsanitize=address,undefined -g")
When you run the code, you should be able to see a sanitizer tab next to the console.

Thread Sanitizer Example

Here is a poorly-written multithreading program:
int counter = 0;
pthread_mutex_t lock;

void *inc() {
  pthread_mutex_lock(&lock); // lock not initiazlied
  counter++; // thread contention
  pthread_mutex_unlock(&lock);
  return NULL;
}

void thread_bugs() {
  pthread_t tid;
  for (int i = 0; i < 2; ++i)
    pthread_create(&tid, NULL, inc, NULL);
  printf("%d", counter); // print the result before join
  pthread_join(tid, NULL); // the first thread is not joined
}
Add the following line to the CMakeLists.txt to enable the Thread Sanitizer
set(CMAKE_C_FLAGS "${CMAKE_CXX_FLAGS} -fsanitize=thread -g")
When the program is executing, the sanitizer will generate a report for thread-related bugs. Be aware that your program might run significantly slower with sanitizers enabled. The sanitizer noticed that two threads are reading/writing to the same memory location at the line counter++;, since we the locked is used before initialized.

There is also a data race between counter++ and the print statement since the main thread did not wait for one of the child threads.

Finally, there is a thread leak by the same reason above.

Address Sanitizer Example

To enable the Address Sanitizer, you need to add the following line to the CMakeLists.txt
set(CMAKE_C_FLAGS "${CMAKE_CXX_FLAGS} -fsanitize=address -g")
It helps you detect heap overflow, which may happen when you incorrectly calculated the size.

Here is an example of overflowing a stack-allocated array

The Address Sanitizer also checks for using freed pointers. Note that it shows you where is memory is allocated and freed.

Here is a silly example of freeing the same memory twice, but it will be less noticeable when different pointers are pointing to the same heap location.

References

https://clang.llvm.org/docs/UsersManual.html https://www.jetbrains.com/help/clion/google-sanitizers.html